Business Card Designer Pro

Business Card Designer Pro is equipped with featured design tools and 1000+ templates to create nice business cards quickly and easily. You can print the cards on your local printer or export your design as PDF or JPG files or bring to a professional printshop for printing.

> Products > Business Card Software > Business Card Designer Pro Guide > Using > Basic Shape Tool > How to Draw Rectangles

How to Draw Rectangles

1Choose to Draw Rectangles

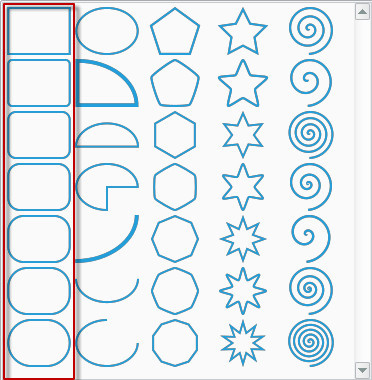
On the Main Ribbon Bar, switch to the "Edit" category. Find the "Basic Shape Tool" tool button on the "Edit Tools" panel. Clicking the icon Baisc Shape Tool Icon will make the Basic Shape Tool the currently active drawing tool. In the options list box on the right, you will see a series of preseted basic graphics.Please select a suitable rectangle style in the first column from the left for subsequent drawing. As shown in the screenshot below.
Business Card Creation - Choose Rectangle Tool

2Draw Rectangle by Drag

Move the mouse to the appropriate position on the canvas and click the left mouse button to determine a vertex of the rectangle. Keep the left mouse button pressed down and drag the mouse until the rectangle gets the desired size and position. Release the left mouse button to end.

Business Card Creation - Draw Rectangle on Canvas

Tip: If the Ctrl key is pressed during dragging, the height and width of the rectangle will be stretched or shrinked at the same ratio.

3Adjust Size if Needs

When you have finished drawing a rectangle on the canvas, you can still adjust the size of the rectangle. Like the Selection Tool, before you adjust, you need to use the mouse to click to select the rectangle to be adjusted. Unlike the Selection Tool, the Rectangle Tool does not support multiple selection, that is, only one rectangle can be selected at a time. If you select other types of objects such as text, paths, or other basic shapes (ellipse, polygon, star, etc.), you need to double-click to activate the corresponding editing tool to adjust them. You can adjust the size of the rectangle in one of the following ways.
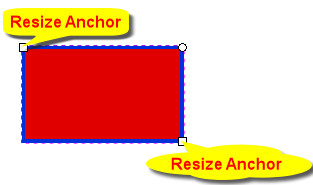
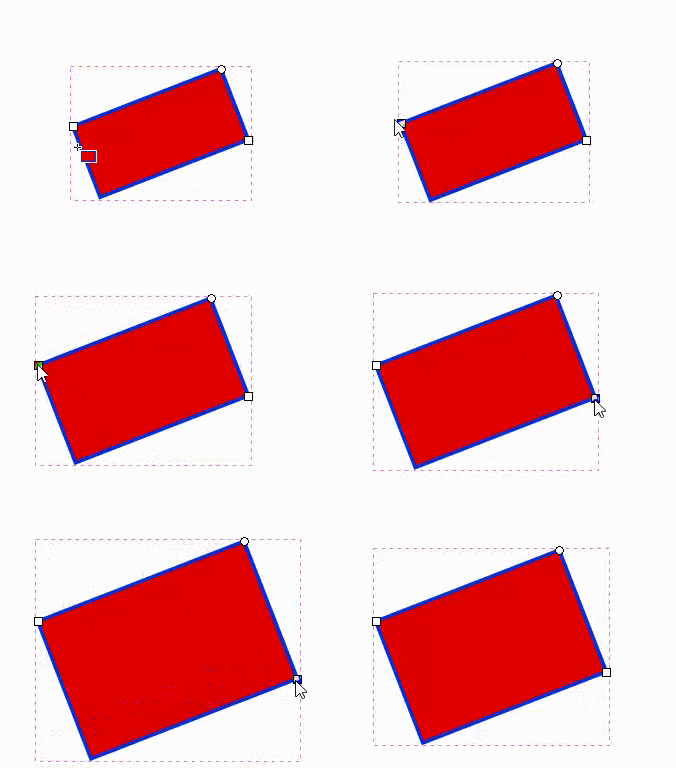
  • Resize by Drag: When a rectangle is selected, square-shaped anchor points will appear in the upper left corner and the lower right corner. They are used to adjust the size of the rectangle. As shown below. Move the mouse over the anchor point, and when it is highlighted, click the anchor point, then keep the mouse pressed, drag the mouse until the rectangle has the most desired size, and then release the left mouse button to end.
    Business Card Creation - Resize Rectangle Anchors Business Card Creation - Adjust Rectangle Dimension
    Resize Anchors Adjust Size
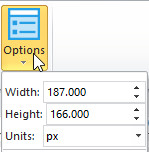
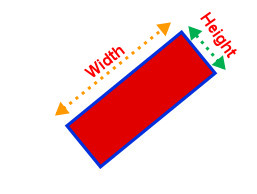
  • Set Width & Height directly: On the Main Ribbon Bar, when the Rectangle Tool is selected, a row of edit controls will appear on the right option panel prompting you to enter the height and width. As shown in the following figure. The height and width mentioned here are not rectangles the height and width of the smallest circumscribed rectangle after rotating or skewing, but refers to the actual size of the rectangle. Enter the appropriate number in the edit box and confirm with the Enter key.
    Business Card Creation - Set Rectangle Dimension Business Card Creation - Width & Height of Rectangle
    Set Size Width & Height

4Adjust Roundness if Needs

You can adjust the roundness of the rectangle in one of the following ways.
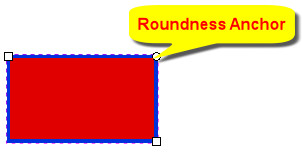
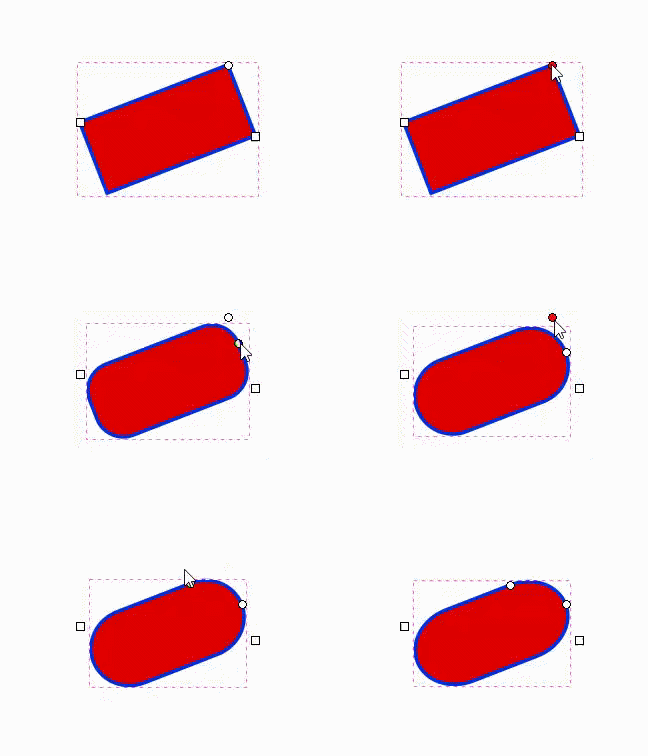
  • Drag Roundness Anchor: When a rectangle is selected, in addition to the anchor points for adjusting the size in the upper left and lower right corners, there is also a circular anchor point for adjusting the roundness in the upper right corner. In fact, there are two such anchor points. During initialization, because the positions completely overlap, it seems that there is only one. They are used to adjust the radius of the roundness in the horizontal and vertical directions, respectively. Move the mouse over the anchor point, and when it is highlighted, click the anchor point and keep the mouse pressed, and drag along a certain edge of the rectangle. Among them, the radius from the upper right corner of the rectangle becomes farther and farther, and the radius of the round corner will become larger and larger, and vice versa. After adjusting to the most suitable radius, release the left mouse button and end.
    Business Card Creation - Roundness Anchors Business Card Creation - Adjust Roundness
    Roundness Anchor Adjust Roundness
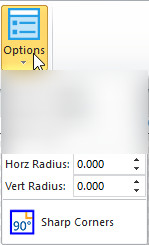
  • Set Radius directly: After selecting Rectangle Tool as the current editing tool, the options panel on the right also contains two edit boxes that can directly set the radius of the roundness. As shown below. They are used to set the radius in the horizontal or vertical direction, respectively. In theory, the maximum value is half of the height (vertical direction) or width (horizontal direction) of the rectangle. The minimum value is 0. You can enter the appropriate size according to actual needs and press Enter to confirm.

    Business Card Creation - Set Raidus of Roundness

    Sharp Corners: Set the radius length to 0. The rectangle does not have any rounded corners, and is a right-angled side.