The canvas is located in the center of the main window of the program. It is the core component of Business Card Designer Pro. Shapes, Paths ,Texts and Group Objects that make up the business cards are all gathered here. The editings, modifications, additions and deletions that occur around these drawing objects all occur here. Business Card Designer Pro provides designers with more than 20+ vector design tools, all run on the canvas in a WYSIWYG manner.
The default size of the canvas is 90 x 50.8, in millimeter unit. Usually a new business card is created with the same size. You can adjust the card size according to actual needs. Activate "Project Settings" subpage on Widgets Bar, Click "Change Format" button you can change the size of business card.
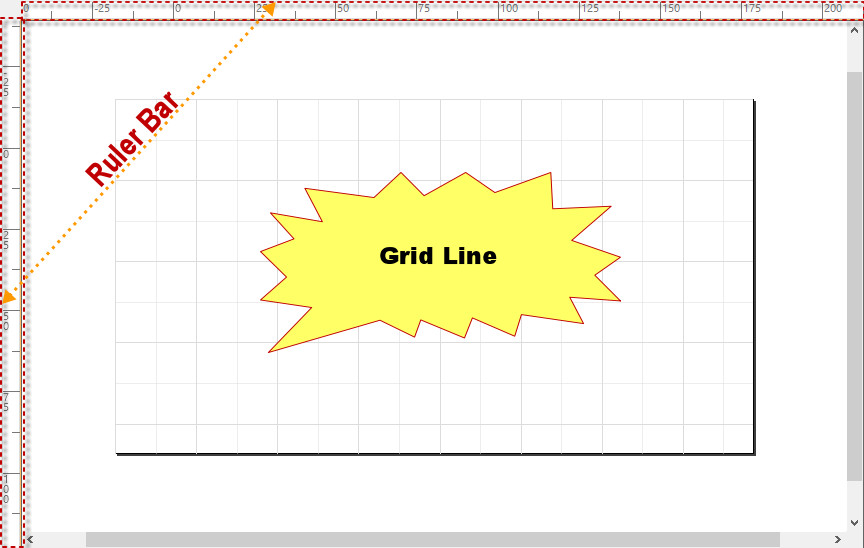
There is a vertical ruler on the left of the canvas, and a horizontal ruler on the top. Sometimes we need to use it as reference to design business card. There must be a certain gap between the objects. The size of this gap requires a size. At this time, auxiliary lines and rulers are used for measurement. Sometimes, how much distance an element moves can also it be used as a target!
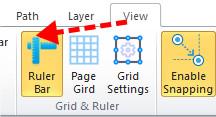
The ruler window can be displayed or hidden according to the actual situation. Switch to the View category in the Main Ribbon Bar and find the "Ruler Bar" button. After clicking, the button is selected and the ruler window appears, otherwise it is hidden.
In addition to the ruler, there are grid lines in the painting. The main function of the grid is to act as an alignment line when using Business Card Designer Pro for drawing. The grid lines evenly divides the canvas into several small blocks of the same size, which is helpful for calibration when drawing. In fact, when using the Selection Tool, the Path Editor Tool to move the nodes on straight or curved segments, these nodes will automatically be attached to the horizontal or vertical grid line closest to it.
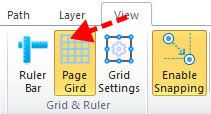
The grid lines can also be displayed or hidden as needed. Switch to the "View" category in the Main Ribbon Bar and find the "Page Grid" button. After clicking, if the button is selected, the grid line will be displayed, otherwise it will be reversed.