EximiousSoft Banner Maker Pro

Banner Maker Pro offers professional graphic-designed tools and high quality prepared banner templates, cliparts, symbols, filters. With which, you can design professional printable business banners and web-based graphics quickly and easily.

> Products > Banner Software > Banner Maker Pro Guide > Editing > How to Put Text into Shape

How to Put Text into Shape

Place the text object in the inner visible area of a shape or path object. The text object regards the shape or path object as its frame. When the frame size changes, the text object rearranges each character to fit the frame size.

1Find Toolbar Buttons

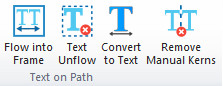
When the Banner Maker Pro program is opened, click the "Text" tabbed item on the Main Ribbon Bar to switch to this category. Then find the "Text on Path" sub-category on the panel. you will find the toolbar buttons. As shown below.

Banner Creation - Toolbar Buttons for Putting Text into Frame

2Select Text & Path or Shape Objects

Next you need to use the Selection Tool to select a text object and a path or a shape object. The shape object or the path object will be used as the frame of the text object.

3Click the Toolbar Button

Move the mouse to the Main Ribbon Bar and click the "Flow into Frame" button to execute this function. As shown below.

  • Text Unflow: After selecting the text with shape or path as its border, click the button to remove the text object from the frame and turn it into a single line of text. Does not retain the original appearance.
  • Convert to Text: After selecting the text with shape or path as its frame, click the button to remove the text from the frame and change it to normal text object, but retain the original appearance.
  • Remove Manual Kerns: Remove all manual kerns and glyph rotations from a text object.

Banner Creation - Put Text into Frame