On the Main Ribbon Bar,
switch to the "Edit" category. Find the
"Basic Shape Tool" tool button on the "Edit Tools"
panel. Clicking the icon  will make the Basic Shape Tool the currently active drawing tool. In the options list box on the right,
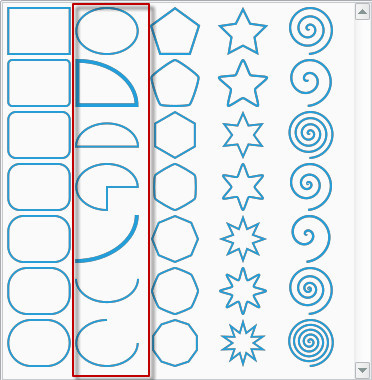
you will see a series of preseted basic graphics.Please select a suitable ellipse/arc style in the second column from the left for subsequent drawing.
As shown in the screenshot below.
will make the Basic Shape Tool the currently active drawing tool. In the options list box on the right,
you will see a series of preseted basic graphics.Please select a suitable ellipse/arc style in the second column from the left for subsequent drawing.
As shown in the screenshot below.
Move the mouse on the canvas near the position of the oval to be drawn. Click the left mouse button, the position will become the center point of the oval. Keeping the mouse pressed down, drag the mouse until the oval has the desired size. Release the left mouse button to end the process.

Tip: If the Ctrl key is pressed during dragging, the height and width of the oval will be stretched or shrinked at the same ratio.
When you have finished drawing an oval on the canvas, you can still adjust the size of the oval. Like the Selection Tool, before you adjust, you need to use the mouse to click to select the oval to be adjusted. Unlike the Selection Tool, the Arc Tool does not support multiple selection, that is, only one oval or arc object can be selected at a time. If you select other types of objects such as text, paths, or other basic shapes (rectangle, polygon, star, etc.), you need to double-click to activate the corresponding editing tool to adjust them. You can adjust the size of the oval by Drag.
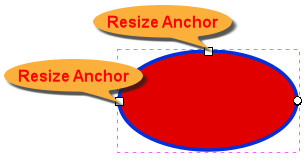
When an oval is selected, square-shaped anchor points will appears at the vertex position of the oval. They are used to adjust the size of the oval. As shown below. Move the mouse over the anchor point, and when it is highlighted, click the anchor point, then keep the mouse pressed, Drag the mouse until the oval has the most desired size, and then release the left mouse button to end.
|
|
| Resize Anchors | Adjust Size |
Tip:If you press the Ctrl key while dragging, the radius of the oval on the horizontal and vertical axes is equal and becomes a circle.
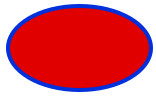
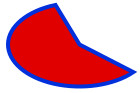
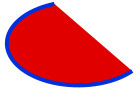
Banner Maker Pro provides three types of Arc objects, namely Closed Arc, Open Arc and Whole Arc. Ovals in the usual sense refers to Whole Arc. See the figure below for specific differences. When Arc Tool is selected as the current editing tool, the corresponding type of button can be found on the options panel on the right. Click it to convert to the specified type of arc Object.
| Whole Arc | Closed Arc | Open Arc |
|
|
|
| Make the shape a whole ellipse | Closed shape with two radius | Unclosed shape |
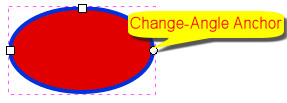
If you need an Open Arc object or Closed Arc object, then you need to set or modify the start angle and end angle of the arc. You can do it in one of the following ways.
|
|
| Change-Angle Anchors | Change Angle by Drag |
